Thursday, March 27, 2014
Create a Lookup with table domain in Maximo 7.5.0.5
Step 1 - Create Table domain
Go
the Domains application (located in Sytem Configuration -> Platform
Configuration) and click on the 'Add New Domain' button at the bottom
right and choose ‘Add New Table Domain’
In the
‘Validation Where Clause’ we state that the entered Workorder number (Will be
stored in GNZ_LQWONUM, look below in this post for the configuration of this field) is compared
to the workorder number in the workorder table.
WONUM=:GNZ_LQWONUM
In the list
the user will get we only want to show workorders that do not have the status
WAPPR. Therefor we we fill in the ‘List Where Clause’
STATUS<>'WAPPR'

Click [OK]
and click on the Save icon in the Domains application
Step 2 - Create a Lookup
Now we need to create the lookup which will show the values of the table domain. Go to the Application Designer application (located in System Configuraion -> Platform Configuration) and in the ‘Select Action’ menu choose ‘Export System XML’
Click on
the export arrow behind the LOOKUPS rows

Make sure
your browser allows popups so the LOOKUPS.XML can be showed by Maximo. Or maybe
your browser wants to save the file directly, if so, do so.
Otherwise, safe the
opened LOOKUPS.XML to a location where you can easily locate it again (e.g.
desktop)
Now we open the LOOKUPS.XML for editing. (I use Notepad++)
Scroll all the way down and add the following table:
Essentially I copy-pasted the existing 'workorder' table in the LOOKUPS.XML and changed the 'workorder' names to 'GNZ_WONUM'

Save the LOOKUPS.XML and in Maximo go to the Application Designer.
Click on the 'Import Application Definition' icon.


Browse to the modified LOOKUPS.XML and import it.


Step 3 - Configure the (Object) Database Attribute
Next we add a database attribute on the Labor - Qualification in which we store the workorder number.
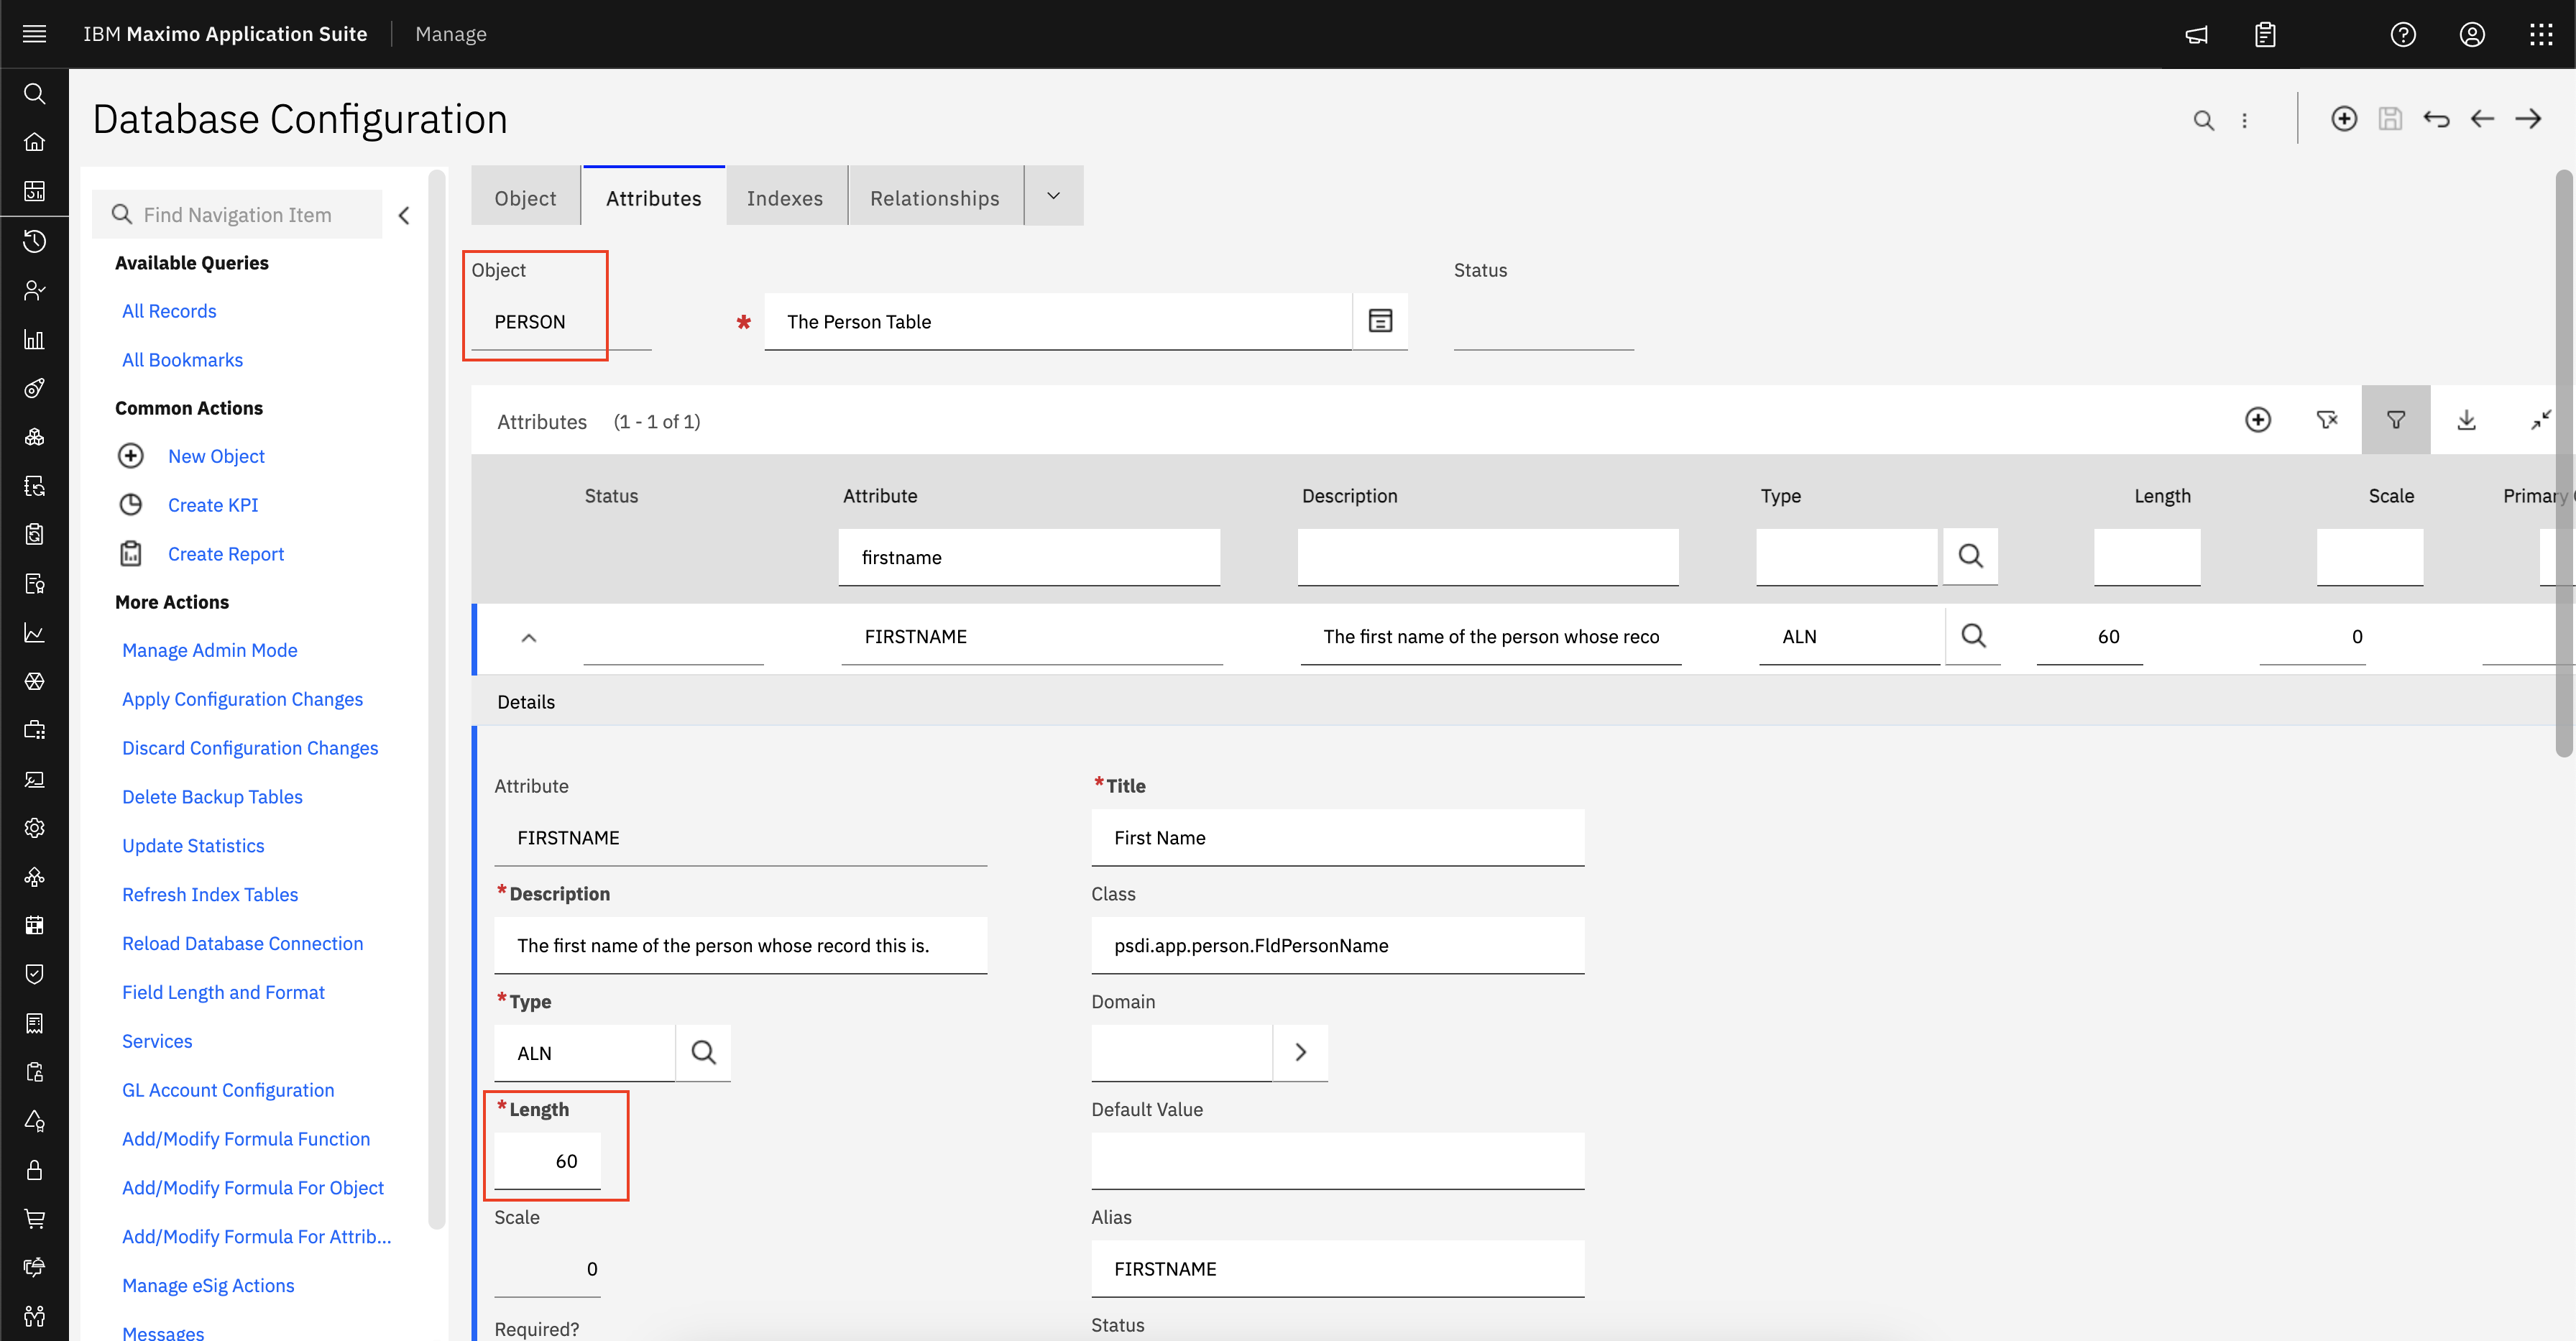
Open the 'Database Configuration' application (located in System Configuration -> Platform Configuration) and in there open the LABORQUAL object and go to the 'Attributes' tab.
In the bottom right click the [New Row] button

Fill in the attribute like in the screenshot below

I use the 'Same as Object' and 'Same as Attribute' fields so the 'Type' and 'Length' will always be able to store Work Order numbers. When the WORKORDER.WONUM field should be modified, this field is modified automically.
Click on the Save icon and go back to the 'List' tab. Do an empty search and the LABORQUAL obejct will come out on top with the status 'To Be Changed'

In the 'Select Action' menu choose 'Manage Admin Mode' and click on the [Turn Admin Mode ON] button.
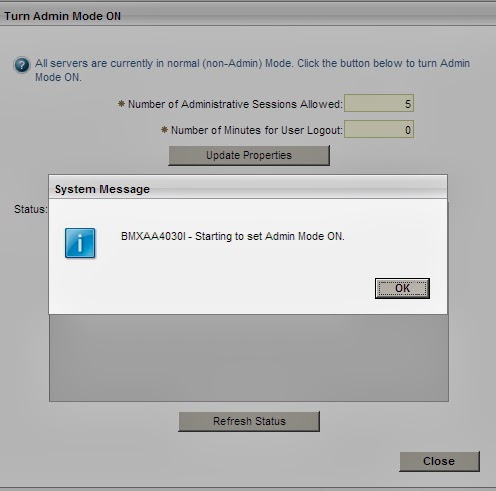
Wait until the Admin mode is on and click [Close]
Now in the 'Select Action' menu choose 'Apply Configuration Changes'
Check the 'Do you have a current backup?' box and click on the [Start Configuring the Database]

When completed, click on the [OK] button.
Choose 'Manage Admin Mode' again from the 'Select Action' menu and turn admin mode off.
Choose 'Manage Admin Mode' again from the 'Select Action' menu and turn admin mode off.
Step 4 - Configure the MAXLOOKUPMAP
Open the LABORQUAL Object again and go to the Attributes tab.
At the far right of the GNZ_LQWONUM field, click on the 'Edit Lookup Map' icon.

Fill in the information required to link the fields:

Click [OK] when done and make sure to save the Object.
Login to the Websphere Integrated Solution Console and restart the 'MXServer'

Step 5 - Configure the field in Application Designer
Open the Application Designer application. and open the LABOR application.
Go to the Qualification tab and make a copy of the Certificate# field. Edit the properties of the field to match them as in the screenshot below.

Save the Application.
Go to the Labor application and open an Active labor.
Go to the Qualifications tab. Add a new row and check the Work Order field with the lookup:

Maximo 7.5 - Use button with Automation Script
Example:
A button on the Work
Order Tracking application that triggers a script. The script will read the
Target Start Date from the Work Order, add the Duration to it and will
automatically fill in the Target Finish Date.
How to:
Open the Automation Scripts application. Create a new ‘Script with Action Launch Point’

Fill in the name of the Launch Point, the Object and
the Name of the Action.
We will see this Actionname later when we configure the
button and an Action with this name will automatically be created. We choose to
use a New script. Click [Next] to continue

Next give the New Script a name and description. I use
jython as the script language. We will add variabeles later on, so leave them
for now and click [Next] to continue.

We need to fill in the script here. As we cannot test it
here we will fill in a ‘1’ (cannot leave it blank for some reason) We will
return later to add the correct script. Click the [Create] button


Open the script and go to the ‘Variables’ tab.
Add the following variables by pressing the [New Row] button
Variable: TARGSTART_IN
Description: Target Start Date
Variable Type: IN
Override: Checked
Binding Type: Attribute
Description: Target Start Date
Variable Type: IN
Override: Checked
Binding Type: Attribute
Variable: ESTDUR_IN
Description: Estimated Duration
Variable Type: IN
Override: Checked
Binding Type: Attribute
Description: Estimated Duration
Variable Type: IN
Override: Checked
Binding Type: Attribute
Variable: TARGFINISH_OUT
Description: Target Finish Date
Variable Type: OUT
Override: Checked
Binding Type: Attribute
Description: Target Finish Date
Variable Type: OUT
Override: Checked
Binding Type: Attribute

Click the ‘Save’ icon at the top of the screen and go to the
‘Launch Points’ tab. Click on the ‘Edit Launch Point Detail’ button.

In this screen we bind the created variables to Attributes.
This can be done per Launch point. So if you create multiple launch points you
can use the same variables but bind them to different Attributes.
Open the Details of the attribute and click on the ‘Select
Attribute Name’ button.


Check the Action application to see the
configuration of the Action that was created.

Do not change anything here, this is configured by creating
the launch point, we will just check it here.

Next we will add the button to the screen. Open the
Application Designer en open the WOTRACK application.

Add a Signature Option to the WOTRACK application by going
to the ‘Select Action’ menu and clicking on ‘Add/Modify Signature Options’

Create a new Signature with the same name as the Action.
Open the ‘Advanced Signature Options’ at the bottom of the
dialog and make sure that
“This is an action that must be invoked by use in the UI” is selected.

Click [OK] and Save the ‘WOTRACK’ application.
Now we add a ‘Pushbutton’ to the Work Order tab. Just
somewhere near the Target Start and Target Finish Date fields.

Open the properties of the Pushbutton. Give the Pushbutton a
label and enter the Signature name as Event.

Save the WOTRACK application.
Now we need to give rights to the authorized groups on the
button. Open the Security Groups application. Open the MAXADMIN group, go to
the ‘Applications’ tab and filter for the ‘Work Order Tracking’ application.
Next filter or search for the Signature option we created
and check the ‘Grant Access?’ option.

Save the group.
Now we need to create the actual script. Go to the
‘Automation Scripting’ application. Open the script we created earlier.
We will replace the current code with the code below;
from java.util import Date
TARGFINISH_OUT = Date(TARGSTART_IN.getTime() + long(ESTDUR_IN *
60 * 60 *1000))
In short the code does the following;
Coverting the TargetStartDate to milliseconds, converting
the estimated Duration to milliseconds and adding them up, converting the total
of milliseconds to a date and storing that in the Target Finish Data.
Click the ‘Save’ button, and to test the script, click the
‘Run’ button.

Result of the ‘Run’ button;

This isn’t telling us much as the variabele is empty, so the
calculation is not working…
To properly test the configuration, we will go to the Workorder Tracking
application, and actually push the button.

Push the button, and the date will be calculated.

Show the Username and Default Insert Site in the Maximo header
To show the currently logged-in user and his Default Insert site in the header of the Maximo 7.5.0.5 application
This information is displayed in Maximo through a menu, but the user will first have to open it. It would be nice to always show the user his Default Insert Site.
Solution:
Show the Default Insert site of the user in the header of Maximo.
In the header there is room for some information, like shown in the picture below:

Step 1 - Locate the file
In order to show information in this part of Maximo we need to modify the titlebar.jsp
This file is located in \IBM\SMP\maximo\applications\maximo\maximouiweb\webmodule\webclient\components
This is regardless of what skin you use.
Make a copy of titlebar.jsp as a backup in this directory.
Modify the titlebar.jsp
After the line (line 20):
String userFullName = control.getWebClientSession().getUserInfo().getDisplayName();
Enter the following lines:
String defSite= "";
try
{
defSite= control.getWebClientSession().getUserInfo().getInsertSite();
}
catch(Exception ex)
{
defSite="Unknown";
}
In essention I create a variable that is empty. I try to get the user his InsertSite and put that in the variable. If no InsertSite exists I fill the variable with the text "Unknown"
Here a picture of the first change:

Then find the following block of code(original line number 130) :
<%=apptitle%>
Enter the following code after the code found above:
User: <%=userFullName%>
Insert Site: <%=defSite%>
Here I add the
code to set the new variable on the screen, I also show the userFullName
variable here in order to show the user his full name.
Here is a picture of the modification:

Next rebuild the maximo.ear and redeploy the Maximo application.
After loggin in
to Maximo you should see the username and default insert site in the
header. Could be that your browser has cached some headerinformation,
always try a hard refresh (CTRL + F5) if nothing shows up.
It should end up looking like this (I changed the name for privacy reasons):

It looks like
itis show twice, but that is only on the startscreen. When opening the
Workorders application for example you will see the second mention of
the name is useful:

Tuesday, March 18, 2014
Deleting non-processed messages from queues – MIF (Maximo Integration Framework)
Queues
The IBM Maximo uses these queues for data integration purposes:
The IBM Maximo uses these queues for data integration purposes:
Inbound sequential (sqin) - Maximo
sequential queue used for importing data
Inbound continuous (cqin) – Maximo
continuous queue used for importing data
Outbound sequential (sqout) – Maximo
sequential queue used for exporting data
Error continuous (cqinerr) – Maximo
continuous queue used for error. The error messages generated in the inbound
continuous queue (cqin) can be redirected to this queue, since the cqinerr has
been previously set for receiving those messages
Queues are structures based on the FIFO (first in,
first out) principle, in which the first elements included in the queue are the
first elements to be removed. In a sequential queue, whenever an error occurs,
this queue stops processing its elements and remains in the same position until
the message is removed or the error is fixed. On the other hand, in a
continuous queue, even if there is an error, this queue moves on processing all
the other elements.
Clients using sequential queues usually have to
delete all the messages of a certain queue during the data integration. We will
use an inbound operation with XML as an example to explain this process:
From an MIF environment correctly set, import the
XML file. MIF then identifies the JMS inbound queue and writes the message into
this queue. If the message contains multiple instances of a document, MIF will
write multiple messages into the queue. If at least one of these messages is
processed with errors, an exception message is identified and no other message
is processed and written into the database.
You can also import several records by using
several XML files or records in an XML file, and this action generates several
messages in the queue. If, by any chance, a failure occurs while importing the
records, you can delete or fix the XML that generated the error in the Message
Reprocessing application (see the picture below). With this procedure, the
following message in the queue is processed. However, if the entire batch of
messages contains errors, you do not need to wait until all the messages are
processed, deleted or fixed; you can use IBM Maximo or the application server
(Weblogic or Websphere) in order to delete all the elements from the queue.
Then, you can perform the required modifications and import news message to an
empty queue.
To use Maximo for deleting the queues, follow these
steps:
Go to Integration > External Systems.
Select the external system used for integration
purposes. Then, go to Select Action > Add/Modify Queues.
Select the queue that contains non-processed data
and click the Delete Queue Data button.
In case you need to check how many messages there
are in the queue, click the View Queue Data button:
Click
OK. If you do not provide any parameters, all the messages will be deleted:
You
will see a message informing how many messages were deleted:

Using Weblogic for deleting the queues:
follow the steps below:
Go to JMS > JMS Modules > intjmsmodule
> sqin > Summary of JMS Messages > sqin
Then, click the Monitoring tab:

Select intjmsmodule!sqin and click Show
Messages

Select Delete
All to delete all the messages:

Check
that all the listed messages have been deleted:


Using WebSphere for deleting the queues: follow the
steps below:
Go to Buses > intjmsbus > destination >
sqinbd > Queue points
Select the sqin target and click Runtime. Then,
click Messages

Click the Delete All button:
Confirm that all messages must be deleted by clicking OK:


Check
that all non-processed messages have been deleted from the queue:
Subscribe to:
Posts (Atom)
Modifying the size of a user field in MAS
Question In MAS you can verify that many of the fields of the user records are also present in Manage application, but how can we change t...
-
Queues The IBM Maximo uses these queues for data integration purposes: Inbound sequential (sqin) - Maximo sequential queue used for...
-
Application Event Model Overview Events are sent to the user interface framework whenever an end user clicks a toolbar button in th...
-
 Here is the sample code. ? 1 2 3 4 5 6 7 8 9 10 11 12 13 14 15 16 17 18 19 20 21 22 23...
