We can now use this Feature Service and follow the steps below:
1) In the Map Manager application, create a new Map (or open an existing map)
2) Select the Map Provider (Maximo Spatial)
3) Select the Site that will be used for the Map. You can choose to set the Initial and Full extents
It should look similar to the image below:

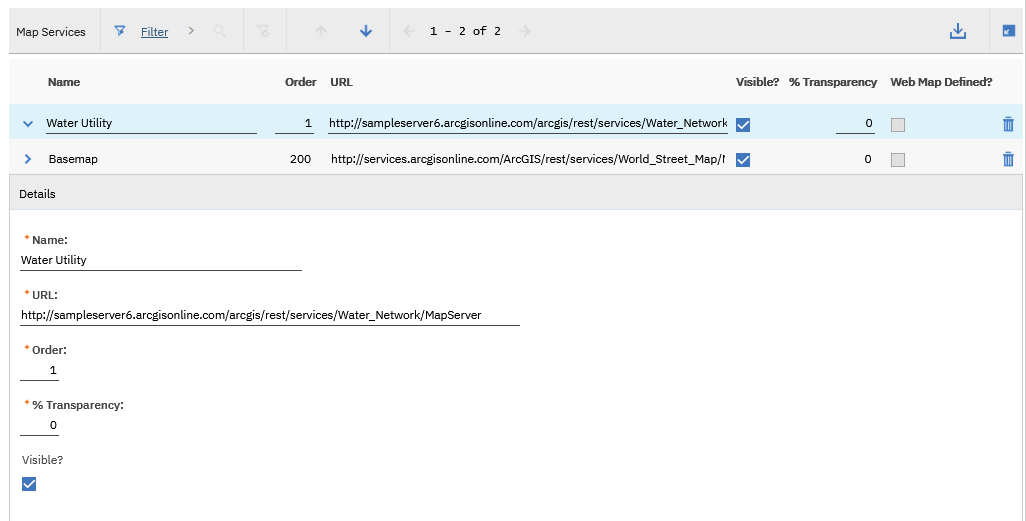
Now we can prepare the Map Service:
1) In the Map Services section, create a new row
2) Enter a name, and in the URL field, paste the feature service referenced above
3) Enter Order: 1 and set the Map to be visible.
This should look like the following:
Now let's create the GIS Objects!
1) In the Service layers, click "Select Layers"
2) Select the Layer you are going to use as a Service layer. (Water Hydrants for example)
3) Open the details of the Service layer you've added, and you should see a few required fields
4) In the "GIS Object Name", specify a name for the GIS Objects you'll create. Eg: WHYDRANT
5) Select the Parent MBO this object will be associated to (assets, location etc). In this case, select asset.
Notice that the System of Record is automatically chosen. For Assets, Locations, and Service addresses the system of record is usually ArcGIS. Workorders and SRs are usually Maximo.
This should look like the following:
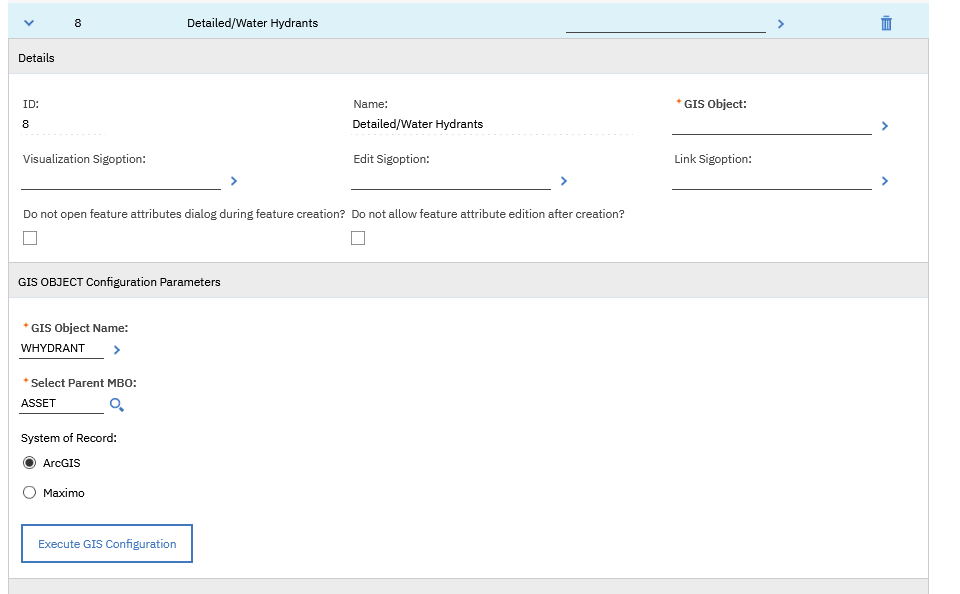
6) And Finally, click the "Execute GIS Configuration"
Notice a page with Select Attributes appears. Select the Attributes that you would like to display and then click OK. This will now create the Object
This should look like the following:
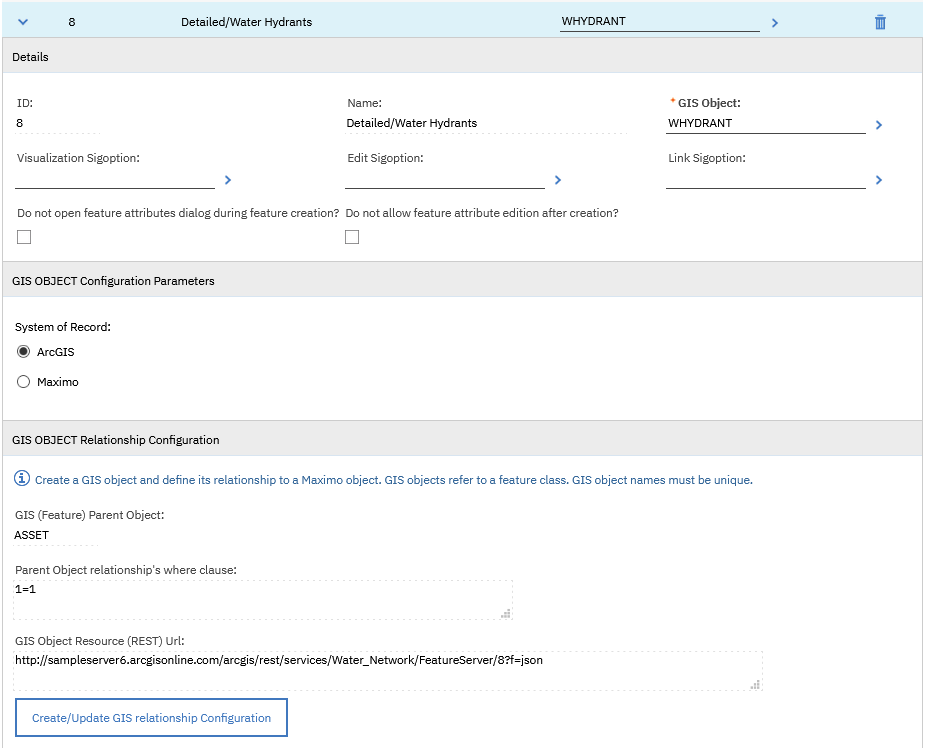
Now, let's define it's relationship to the Maximo Object and our Identifier will be the FacilitiesID
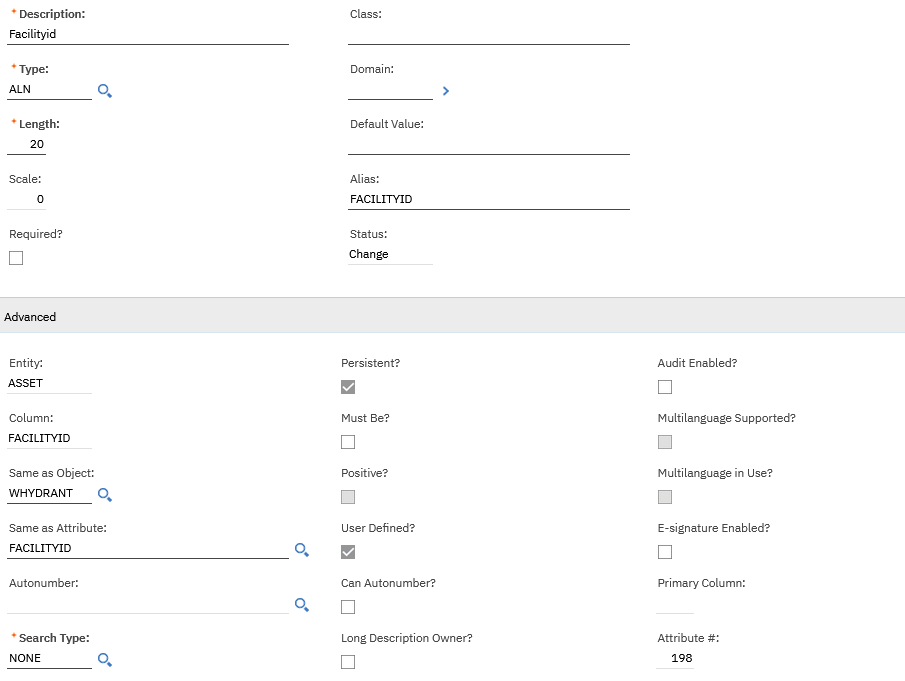
1) Go to the DB Configuration application
2) Search for, and bring up Assets object
3) On the attributes, click new row
4) In the "Same as Object", select the WHYDRANT we've created and "Same as Attribute" as FACILITYID
This should look like the following:
Save the Record, and apply the configuration changes to the DB
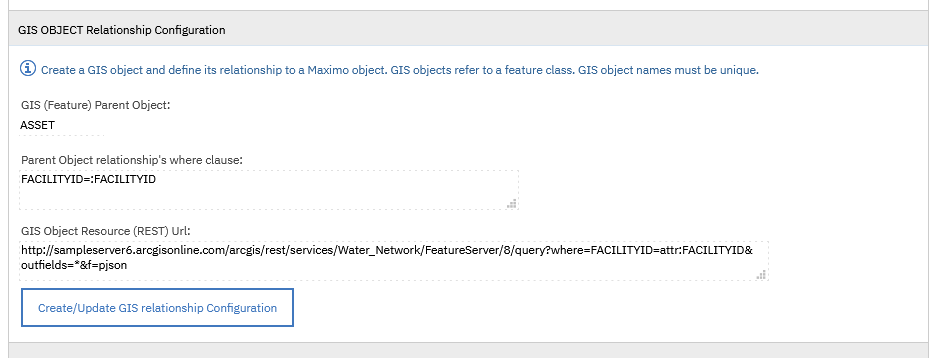
Finally, let's go back to the Map Manager application. In the Service layers, click the "create/update GIS relationship configuration" and then "new row" button
Add the Attributes as follows and then click OK:
This should look like the following:
And That's it! Your feature object is now created and configured
Reference Link : https://www.ibm.com/support/pages/getting-started-maximo-spatial-76-creating-gis-objects
